
Financial Settings
The Financial Settings menu allows you to configure how invoices and statements are generated, numbered, branded, and sent to your contacts. This includes:
- Invoice and statement numbering and due dates
- Header branding and business details
- Payment instructions
- Communication templates used for sending invoices, statements, and credit notes
These settings ensure your financial documents are consistent, compliant, and aligned with your business branding.
General Tab
This section controls the core configuration for invoices, credit notes, and statements.
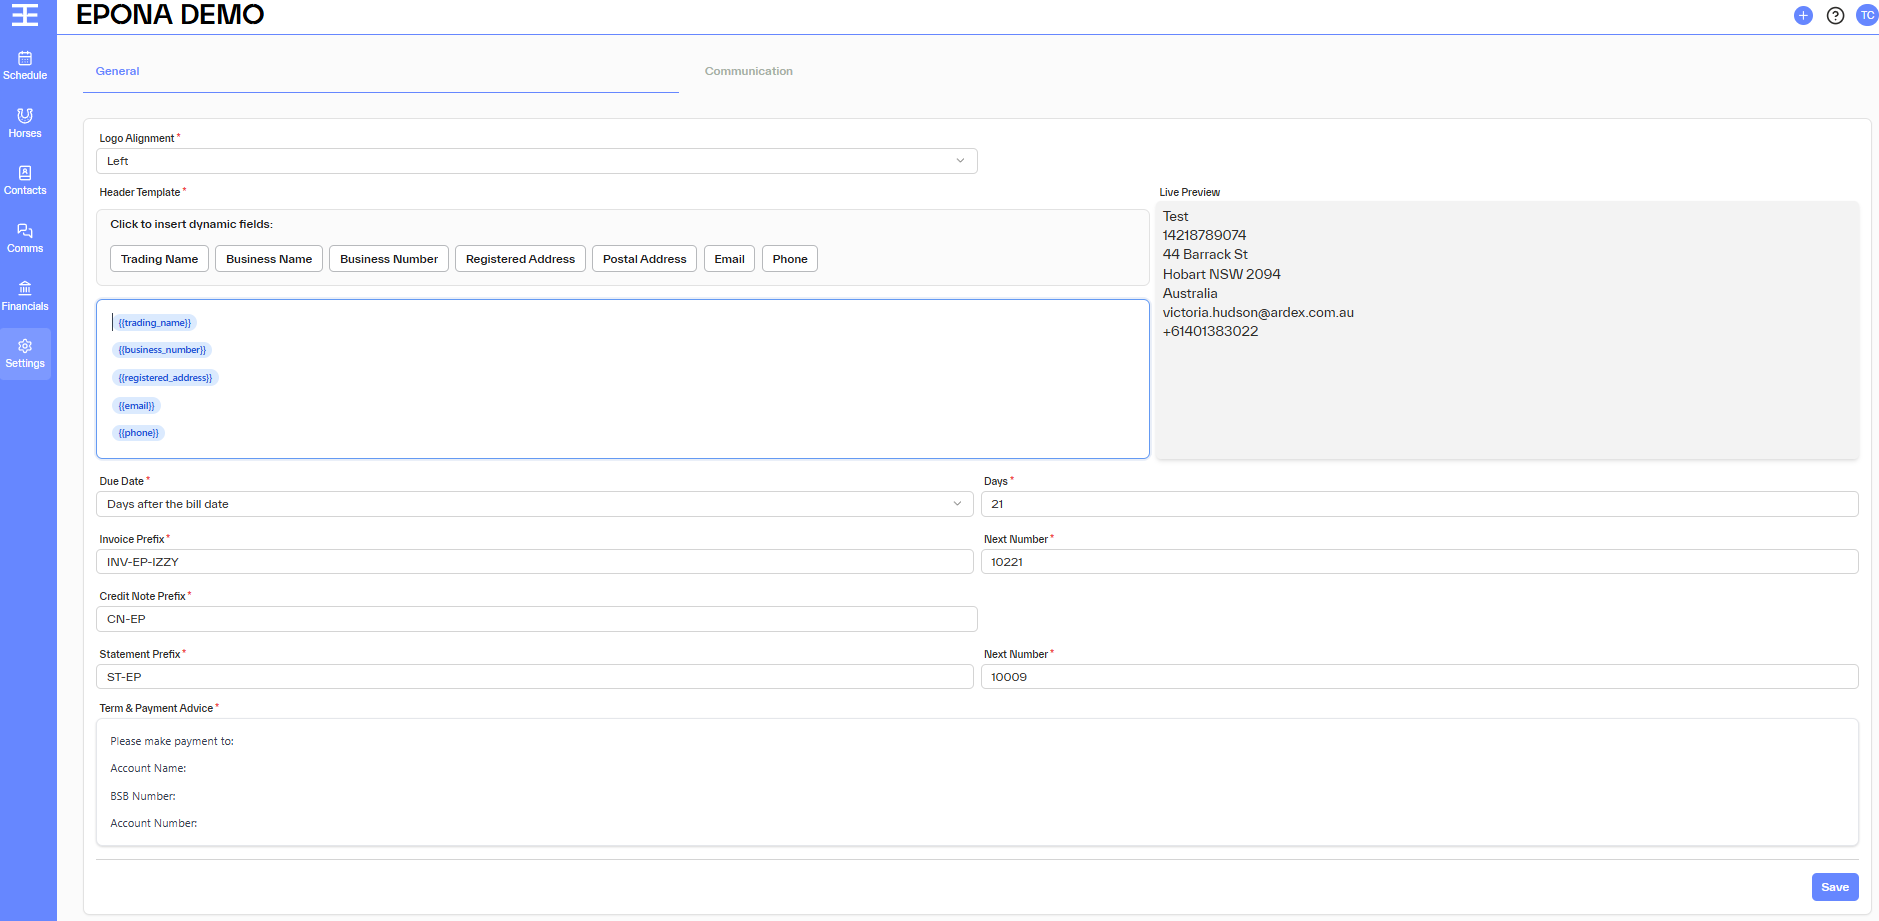
Logo Alignment
Select how your logo appears on financial documents:
- Left
- Centre
- Right
Header Template
The header template defines the business information displayed at the top of invoices and statements.
You can insert dynamic fields by clicking on the available options, including:
- Trading Name
- Business Name
- Business Number
- Registered Address
- Postal Address
- Phone
These fields automatically populate based on your business information details.
A live preview is shown on the right-hand side so you can see how the header will appear on documents.
Due Date
Define when invoices are due for payment:
- Days after the bill date – select the rule
- Days – enter the number of days (e.g. 21 days)
This setting applies to all newly generated invoices.
Invoice Numbering
- Invoice Prefix – text that appears before each invoice number (e.g.
INV-EP) - Next Number – the next invoice number that will be generated
- Invoices will automatically increment from this number.
Credit Note Numbering
- Credit Note Prefix – prefix applied to all credit notes (e.g.
CN-EP)
Statement Numbering
- Statement Prefix – prefix applied to statements (e.g.
ST-EP) - Next Number – the next statement number to be generated
Note - Statement Numbering only appears if statements are turned on for your workspace.
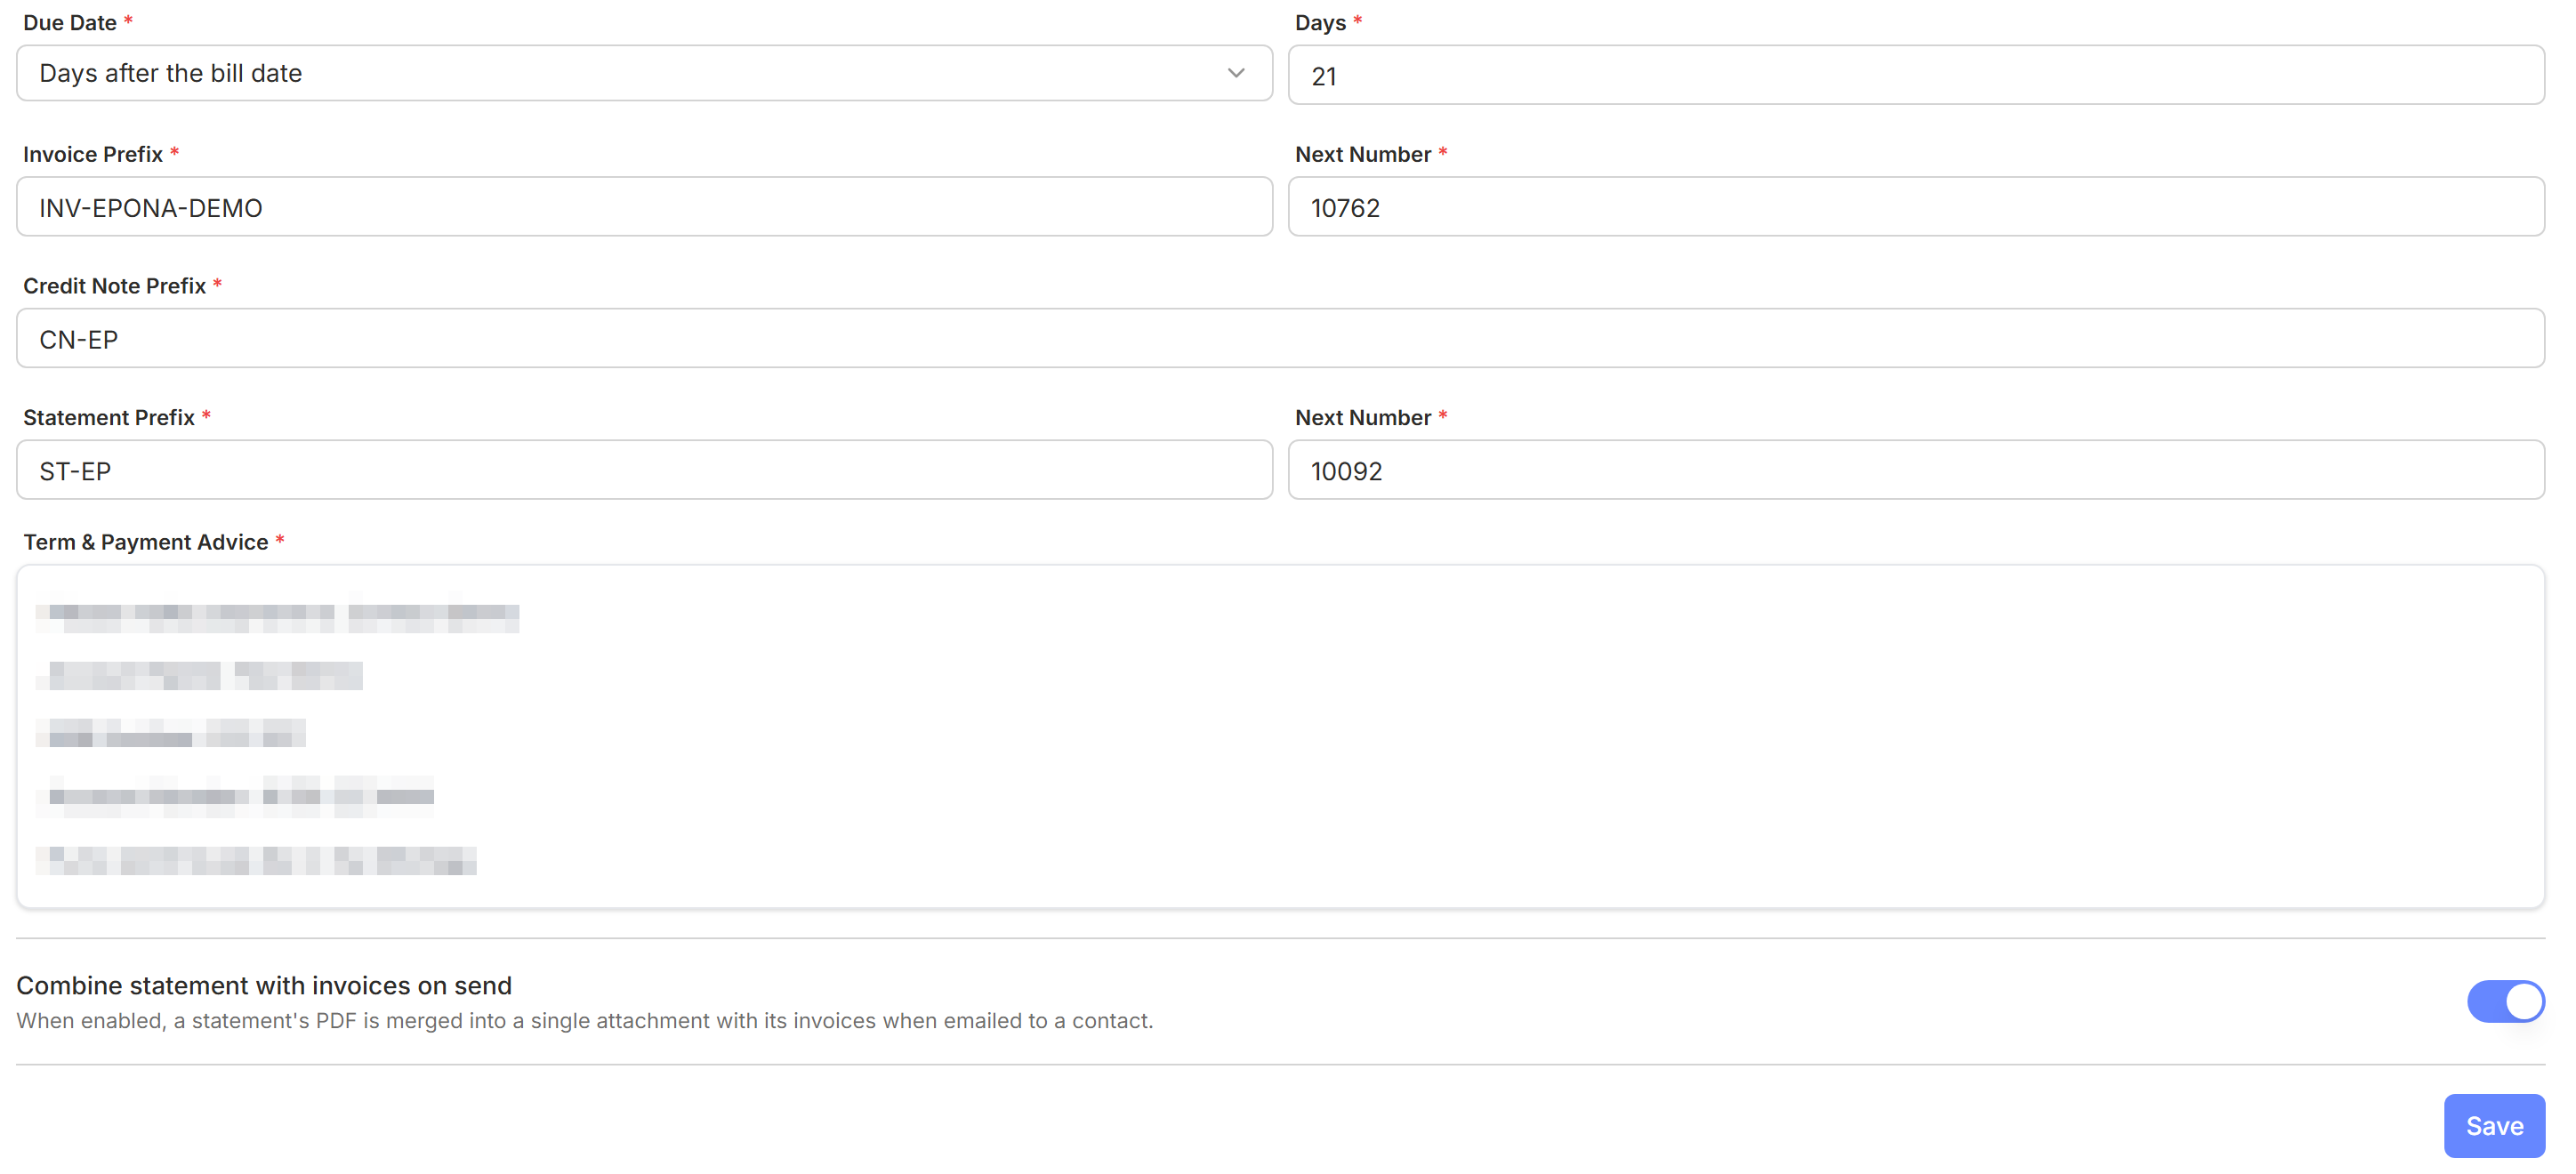
Terms & Payment Advice
Use this free-text field to add payment instructions that will appear on invoices and statements, such as:
- Account Name
- BSB
- Account Number
- Additional payment notes
Example:
Please make payment to: Account Name: … BSB: … Account Number: …
Combine Statement with Invoices
Combine statement with invoices on send – "When enabled, a statement's PDF is merged into a single attachment with its invoices when emailed to a contact." When switched off, the statement and each invoice are separate attachments on the same email.
This setting is saved as soon as you switch it, and does not need Save. It only appears if statements are turned on for your workspace.
Saving Your Changes
Make sure to click Save to apply any updates. Changes will affect all future invoices and statements.
Communication Tab
The Communication tab controls how financial documents are sent to contacts.
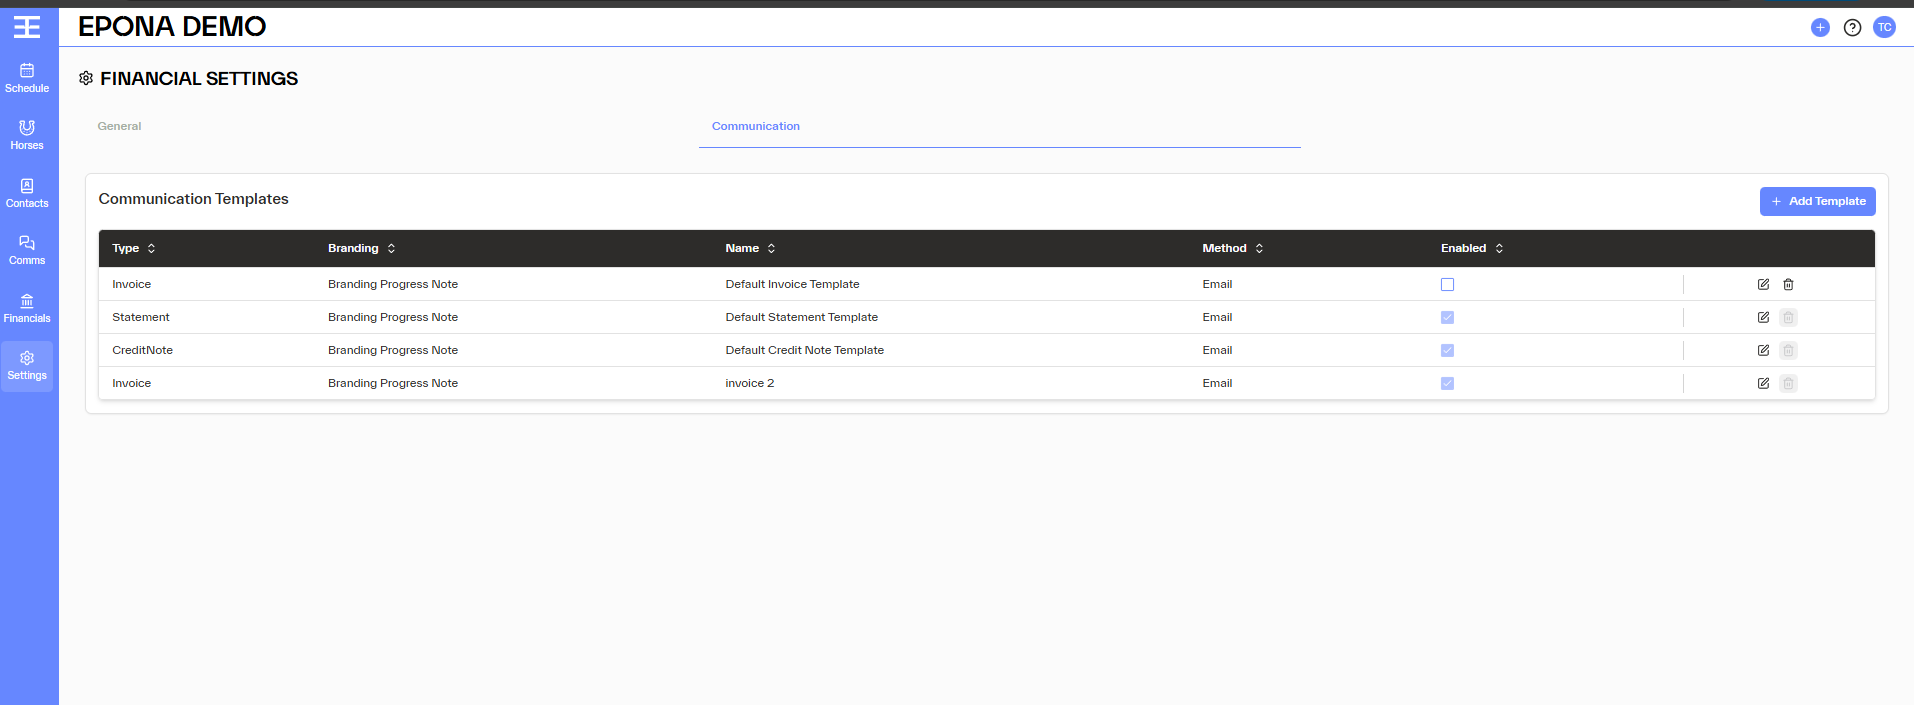
What Are Communication Templates?
Communication templates define the email content and branding used when sending:
- Invoices
- Statements
- Credit Notes
Each template is linked to a specific document type. Statement templates can include these statement fields: Statement Date, Statement End Period, Account Balance, Opening Balance and Closing Balance.
Viewing Existing Templates
The table displays all configured templates, including:
- Type – Invoice, Statement, or Credit Note
- Branding – the branding template applied
- Name – template name
- Method – delivery method (e.g. Email)
- Enabled – whether the template is active
- Only enabled templates can be used when sending documents.
Adding a New Template
To create a new communication template:
- Click + Add Template
- Select the document Type (Invoice, Statement, or Credit Note)
- Choose the Branding template
- Enter a Name for the template
- Select the Method (e.g. Email)
- Configure the email content and dynamic fields
- Enable the template
- Save your changes
Editing a Template
To edit an existing template:
Click the edit (pencil) icon next to the template
Update the content, branding template, or settings
Save your changes
Enabling or Disabling Templates
Use the Enabled checkbox to control whether a template can be used
Disabled templates will not be available when sending financial documents