
Transactions Report
The Transactions Report gives you a complete, organised view of billable activity for your horses - grouped by horse, broken down by who's responsible for payment, and totalled so you can see exactly what's owed before you invoice.
This article explains what's in the report, the two ways you can view it, and what each status means.
Where to find it
The Transactions Report is available in two places:
- End of Period → Review Transactions step - while working through your End of Period process, you'll see View Report and Export buttons at the top of the transaction list.
- Transactions screen (under Financials) - the same View Report and Export options are also available directly from the main Transactions screen, so you can generate the report any time without needing to start an End of Period run.
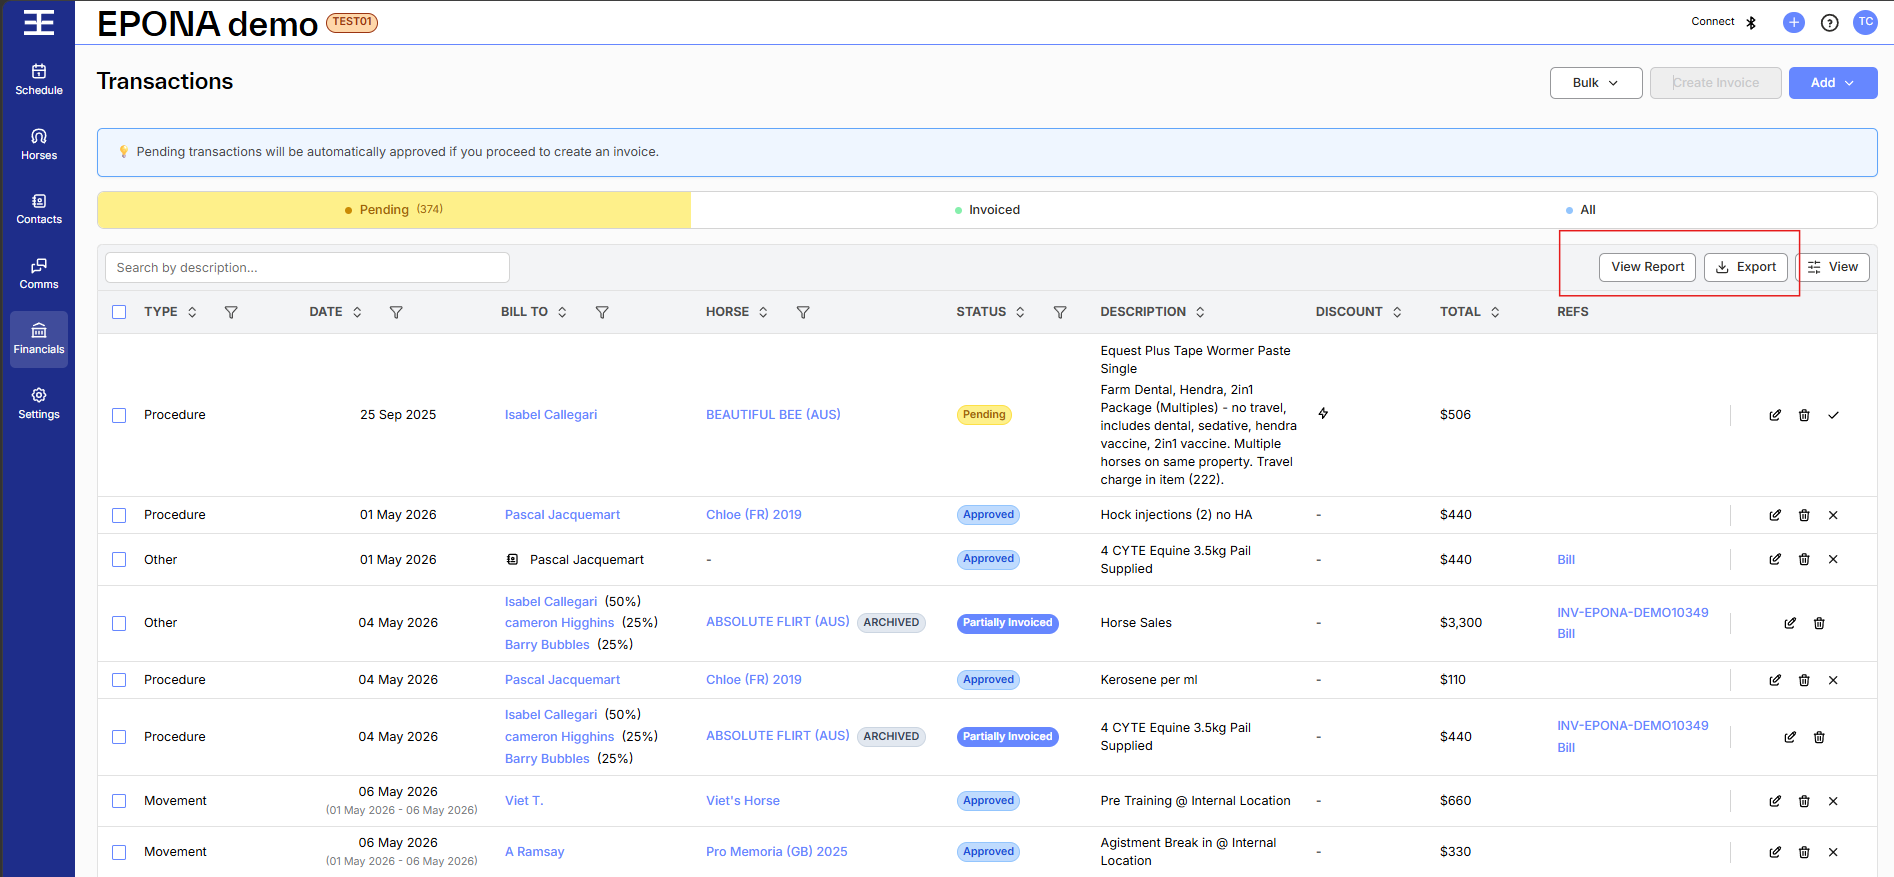
In both places:
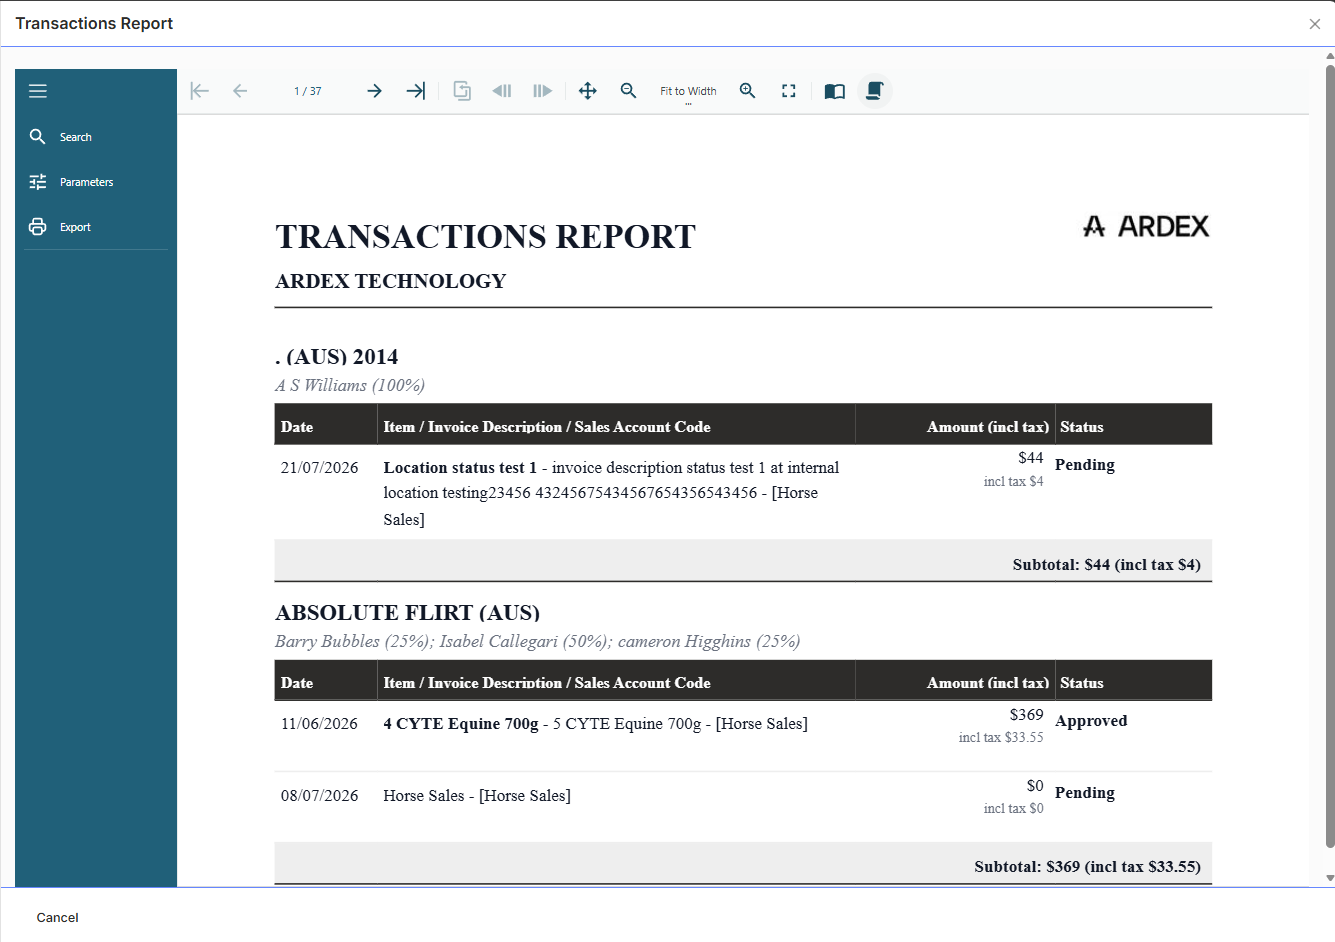
- View Report - opens the report inline so you can review it without leaving the page.
- Export - downloads the report as a file (PDF, Excel, or CSV) to save or share.
You can go back and forth between reviewing your transactions in the table and previewing the report as many times as you like - nothing is finalised until you complete the End of Period process (if that's the screen you're working from).
View Report vs. Export
View Report | Export | |
|---|---|---|
Purpose | Quick preview inside Epona | Download a copy to keep or send |
Opens as | An on-screen viewer | A file on your device |
Format | PDF-style preview and export | PDF, Excel, or CSV - your choice |
File saved? | Yes - you can export a PDF straight from the viewer using the print icon | Yes |
Both options pull from the exact same data, so what you see in View Report is exactly what you'll get when you Export - there's no difference in content, only in whether you're previewing or saving a copy.
When you export, the file is automatically named with the report type and the date and time it was created, for example:
transactions-20260710-145958This makes it easy to tell reports apart if you export more than one during the day.
Working with the View Report screen
Once you've opened View Report, the viewer gives you a few tools to help you review and finish up:
- Search — use the search bar to find specific words in the report (a horse's name, a contact, an item description, etc.) instead of scrolling through the whole thing.
- Business Name and Business Logo — you can edit the business name and logo shown in the report header for this report. If you'd rather they didn't appear at all, click into the field and clear it (leave it as null) to hide it from the report.
- Print icon — click the print icon in the viewer toolbar to export the report as a PDF, the same file you'd get from the Export button.
How the report is organised
The report groups all transactions by horse, listed alphabetically. Under each horse, transactions are further grouped by who's being billed - this is because a single horse can have multiple owners, agistment clients, or other billable parties, each with their own share of the costs.
For each billing group, you'll see:
- The date of the transaction
- The item or service provided, with a short description
- The amount, including tax
- The status of the transaction (see below)
- A subtotal for that horse and billing group
At the very end of the report, a grand total shows the full amount across every horse and every transaction included.
How filters affect what's included
Whether the report respects your table filters depends on where you're viewing it from:
- On the Transactions screen, any filters you've applied to the table carry through to the report. For example, if you filter the table down to 10 horses, both View Report and Export will only include those 10 horses - the report always matches what you're currently looking at.
- During End of Period, filters are not applied to the report. Even if you filter the Review Transactions table down to a subset of horses, View Report and Export will still include every transaction being considered for that billing period. This is by design - it stops transactions from being accidentally left off the report (and out of your attention) just because a filter happened to be applied, since everything in that step goes on to be billed.
In short: filter freely on the Transactions screen to get a report scoped to what you need, but during End of Period, treat the report as always showing the full period regardless of any filters you've applied to the table.
Who's being billed ("Bill To")
Under each horse's name, you'll see who the transactions are billed to, along with their percentage share. This is worked out automatically based on:
- A single billing contact - if one contact is responsible for the horse, you'll see their name at 100%.
- Ownership shares - if the horse has multiple owners or shareholders, each is listed with their percentage (e.g. Isabel Callegari (50%); Ben Cooper (50%)).
If none of these apply - for example, a horse with no ownership or billing contact set up yet - this line will say "Ownership not specified." It's worth checking these before you invoice, as they won't be billed to anyone until a contact is assigned.
Understanding transaction statuses
Each transaction shows one of the following statuses:
Status | What it means |
|---|---|
Pending | The transaction hasn't been approved yet - it's still editable. |
Approved | Ready to be invoiced, and edit-locked now that it's approved. |
Invoiced | Already included on a finalised invoice. |
Partially Invoiced | Part of this transaction has already been invoiced (for example, if it was split across two billing periods or contacts). |
Skipped
(shown in italics) | This transaction won't be included when you generate invoices this period - either because it's been manually excluded, or (in some cases) because it doesn't yet have a valid billing contact. |
Reviewing the statuses before you finalise your End of Period is the best way to catch anything that needs attention - for example, a transaction stuck on Pending that you expected to be Approved, or a horse showing as Skipped because it's missing a billing contact.
Quick tips
- Preview first, export when ready. Use View Report to check everything looks right, then use Export once you're happy - this avoids cluttering your downloads with drafts.
- Use search to jump straight to what you need. In the View Report screen, search for a horse, contact, or item instead of scrolling through the whole report.
- On the Transactions screen, use filters to scope the report - filter down to the horses, dates, or contacts you care about, and both View Report and Export will follow.
- During End of Period, don't rely on filters to narrow the report - it always reflects the full period being billed, by design.
- Check for "Ownership not specified" lines. These usually mean a horse is missing an ownership or contact record, and its transactions won't be invoiced until that's fixed.
- Skipped items are excluded on purpose. If something is marked as Skipped and you didn't expect it, double-check the horse's contact and ownership setup.
- Your business logo and details appear automatically on the report header, matching your other billing documents like invoices. You still can turn them off from View Report> Parameters> Null
- Don't want your logo or business name on this report? Clear the Business Name/Business Logo field in the viewer (leave it null) to hide it - handy for internal-only copies.
If you have questions about a specific transaction or status you're seeing, reach out to your Epona support contact for help.